
Tuesday, January 21, 2014
Tumblr! Tumblr. Tumblr?
I've started posting over at tumblr at sakievich.tumblr.com. It's much easier to use from my phone or ipad and links into my instagram. So, go there, follow it and carry on.
Sunday, December 1, 2013
Figure Drawings Recent and Past
With the help of Henry K. Fung, I had a number of things photographed recently, some at a higher level of quality than before. Included in this were some of my extended pose figure drawings from the last few years including a couple that were completed over this last summer.


Saturday, November 30, 2013
Pre Hong Kong Plein Air
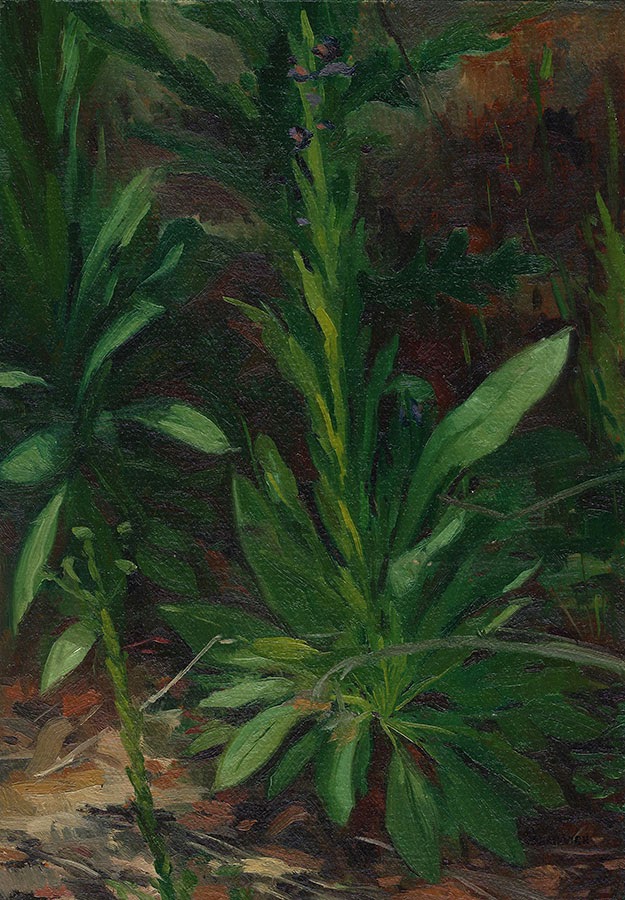
Here are a few paintings I did before moving to Hong Kong. These have been sitting on my hard drive for a while and I had forgotten that I had them. They are all oil on amber shellacked paper.
The first was done with Richard Hull's landscape painting group shortly before leaving Utah for Hong Kong.


The first was done with Richard Hull's landscape painting group shortly before leaving Utah for Hong Kong.

This was done on the side of the road on the way back from viewing the annular eclipse, which...started in Hong Kong. I went down to southern Utah on a painting trip to view it.

This was part of that same trip. The location is called Grosvenor's Arch. It's a little out of the way, but worth the trip.

People in my plein air group like to make fun of me for painting the weeds (see the one at top for more weeds). There are at least a couple different approaches to going landscape painting on location outside. One is to paint and simplify the big scene. This is very valuable as a tool for developing a compositional, lighting and general atmospheric sense of the big landscape. It allows you to develop space and abstract your visual perception. If you haven't done it before, the beginning landscape painter is often overwhelmed by the wealth of detail available and quite literally indescribable. Another is to paint the smaller intimate details, like weeds or branches or other small and medium flora. This is, to paraphrase Durand, to familiarize yourself with the alphabet of the landscape. These are the bits and pieces that make up the larger more dynamic space. It's something that I've grown fond of after participating in two Hudson River Fellowships.
Wednesday, November 27, 2013
Oil Painting Exploration PNTG203 demos
Here are some demos of the different processes my students explore in PNTG 203 at SCAD in Hong Kong during the Spring of the last school year and the Fall of this school year. Each are slightly smaller than A4. I have my students work at this relatively small scale so that the images are big enough to be completed in the allotted time. I walk them through the basic processes of oil painting beginning with the imprimatura (wipe out), grisaille, warm/cool and dead layer, simplified neapolitan method, and venetian method. Each section lasts for two weeks of classes, which gives you the full ten weeks of the quarter.
These first three are imprimaturas (wipe outs) using one color on a white surface that is then wiped back to reveal the white of the canvas to varying degrees to get at the effect of light and form on the surfaces. These were done as alla prima demos in class ranging from 1.5 to 2.5 hours in class.


This is a grisaille done using cold black and titanium white. In this demo I intentionally left some areas less finished than other areas to serve as a reference for my students. My demos get pinned up in the classroom. I start with a fairly rough imprimatura, which you can see in the background, bowl and mushroom. I lay in flat colors in the light first, as you can see in the light part of the mushroom and the table top And then I modulate those tones from that middle average to lighter and darker parts of the light side. Depending on the final effect I'm seeking I may leave the shadow areas largely untouched by white, as I did in this demonstration.


These first three are imprimaturas (wipe outs) using one color on a white surface that is then wiped back to reveal the white of the canvas to varying degrees to get at the effect of light and form on the surfaces. These were done as alla prima demos in class ranging from 1.5 to 2.5 hours in class.


 |
| Cast paintings are better when dressed up. |
This is a grisaille done using cold black and titanium white. In this demo I intentionally left some areas less finished than other areas to serve as a reference for my students. My demos get pinned up in the classroom. I start with a fairly rough imprimatura, which you can see in the background, bowl and mushroom. I lay in flat colors in the light first, as you can see in the light part of the mushroom and the table top And then I modulate those tones from that middle average to lighter and darker parts of the light side. Depending on the final effect I'm seeking I may leave the shadow areas largely untouched by white, as I did in this demonstration.

The next section is the warm/cool and dead layer. This is a sample of one of the dead layer exercises we do. I have them grid their A4 sheets into 1 cm squares on a pre-toned dark brown surface. Using Venetian Red, Yellow Ochre, Blue Black and Titanium White they must choose the single color that most belongs in each block. That may be either an average of the tones of that region or the dominant color. The choice affects the final effect of the portrait. Each square must be filled in completely with no ground showing through and each square must be assessed and filled individually. When painting from the live model, I arrange for the model to remain with the class beyond the end of the class period so that they may keep working after I have left.

The final two exercises involve simplified versions of the Neapolitan Method (Carravaggio) and the Venetian Method (Titian). The Venetian method is shown below. The white surface is toned before class in a soft layer of Venetian Red or any other warm earth red. For this class I go into the local meat markets and procure a pig head, which is frozen between class sessions. I also leave the pig head out for after class ends for students who wish to continue to develop it. The surface is oiled out with linseed oil before painting and liquin is used to accelerate the drying time.
A brown tonal imprimatura is laid over the pre-toned surface for the drawing during the first session. During the second session a layer of white is used to describe the forms primarily in the light side and some thinner layers in the dark side. No other colors are used, simply white that is thinned out to describe the form. Students are encouraged to develop the texture of the surface based on the tactile qualities native to the object and to consider the use of the cooler temperatures that emerge in the interaction with the lower layers as the paint is thinned at the cooler turnings of the form. The third session is a glazing session, where transparent colors are placed broadly to describe the general colors of the area. This works well with the white and adds a more luminous general effect. Warm tones are especially emphasized in the crevasses to heighten the effect of subsurface scattering. During the fourth and final session, also the last day of classes when students are already mentally gone, a finishing layer is applied using a couch (a thin soupy tone that is placed over everything as a unifying layer) and then the opacity of the lights is reestablished. I brought in some of my flake white stash to show the special subtle working properties it has. Due to time constraints, I focused primarily on the pig head during each evening of class. Edges are emphasized and the shadows are generally left alone as the forms in the light side are developed tonally and topographically.

Friday, May 3, 2013

Tuesday, April 30, 2013


Sunday, April 28, 2013
Almost done
This picture I started last year is nearly complete. Just some minor touch ups and a certain effect I'm still working on.
 |
| Blurry iPhone shot |
Subscribe to:
Posts (Atom)